General notes
This website presents design data in tabular formats as assistance to engineers who are designing buildings in accordance with EN 1993-1-1[1] and EN 1993-1-5[1] and their respective National Annexes. Where these Parts do not give all the necessary expressions for the evaluation of data, reference is made to other published sources.
The symbols used are generally the same as those in these standards or the referred product standards. Where a symbol does not appear in the standards, a symbol has been chosen following the designation convention as closely as possible.
1.1 Material, section dimensions and tolerances
The structural sections referred to herein are of weldable structural steels conforming to the relevant European Standards given in the table below:
Table 1.1 Structural steel products
|
Product |
Technical delivery requirements, |
|---|---|
|
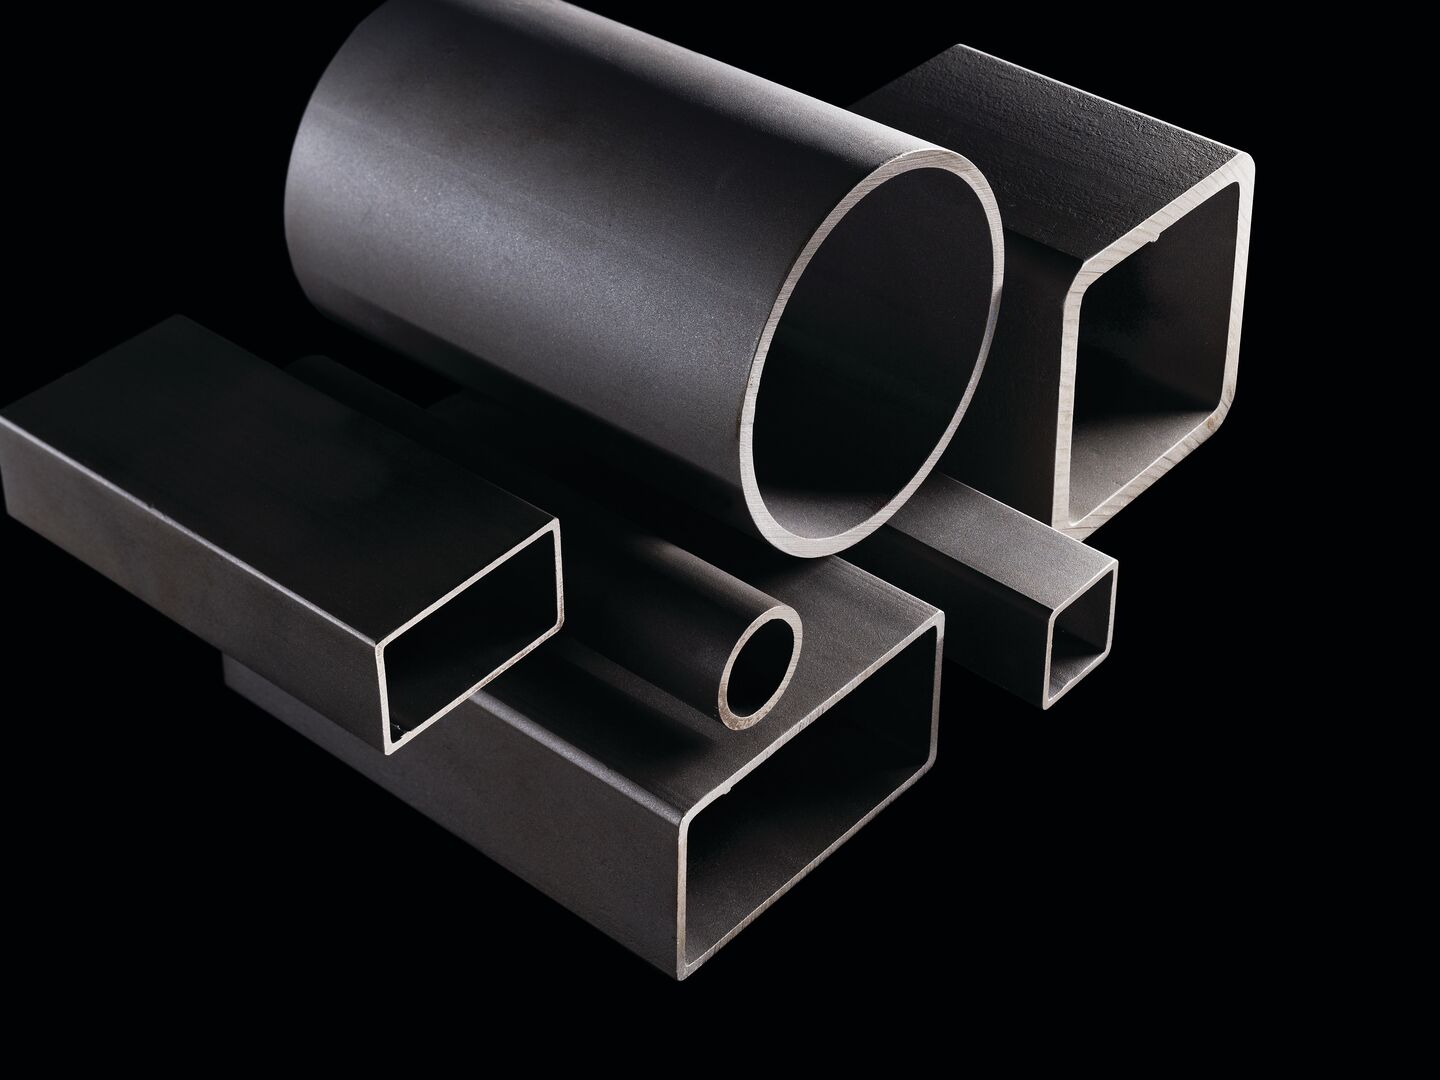
Hot finished structural |
EN 10210-1[2] |
1.2 Dimensional units
The dimensions of sections are given in millimetres (mm).
1.3 Property units
Generally, the centimetre (cm) is used for the calculated properties but for surface areas, the metre (m) is used.
1.4 Mass and force units
The units used are the kilogram (kg), the Newton (N) and the metre per second squared (m/s2), so that 1 N = 1 kg × 1 m/s2. For convenience, a standard value of the acceleration due to gravity has been accepted as 9.80665 m/s2. Thus, the force exerted by 1 kg under the action of gravity is 9.80665 N and the force exerted by 1 tonne (1000 kg) is 9.80665 kilonewtons (kN).
1.5 Axis convention
The axis system used in EN 1993 is:
x along the member
y major axis, or axis perpendicular to web
z minor axis, or axis parallel to web
2.1 Masses
The masses per metre have been calculated assuming that the density of steel is 7850 kg/m3.
In all cases the tabulated masses are for the steel section alone and no allowance has been made for connecting material or fittings.
2.2 Ratios for local buckling
For circular hollow sections the ratios of the outside diameter to thickness (d / t) are given.
For square and rectangular hollow sections the ratios (cf / t) and (cw / t) are given where: cf = b - 3t and cw = h - 3t
For square hollow sections cf and cw are equal.
The dimensions cf and cw are not precisely defined in EN 1993-1-1[1] and the internal profile of the corners is not specified in EN 10210-2[2]. The above expressions give conservative values of the ratio for hot-finished sections.
3.1 General
All section properties have been accurately calculated and rounded to three significant figures. They have been calculated from the metric dimensions given in the appropriate standards (see Section 1.1).
Section properties are given for hot-finished hollow sections. Note that for the same overall dimensions and wall thickness, the section properties for square and rectangular hot-finished and cold-formed sections are different because the corner radii are different.
For hot-finished square and rectangular hollow sections, the section properties have been calculated using the external and internal corner radii as specified by EN 10210-2 [2] in Table 3.1 below.
Table 3.1 Corner radii for calculation of section properties, hot finished hollow section
- Maximum external corner radii = 1.5t
- Maximum internal corner radii = 1.0t
3.2 Second moment of area (I) and radius of gyration (i)
The second moment of area has been calculated taking into account all radii of the sections. Values are given about both the y-y and z-z axes.
The radius of gyration is a parameter used in the calculation of buckling resistance and is derived as follows:
i = [I / A]1/2
where:
I is the second moment of area about the relevant axis
A is the area of the cross section
3.3 Elastic and plastic section modulus (Wel and Wpl)
The elastic section modulus is used to calculate the elastic design resistance for bending or to calculate the stress at the extreme fibre of the section due to a moment. It is derived as follows:
Wel,y = Iy / z
Wel,z = Iz / y
where z, y are the distances to the extreme fibres of the section from the elastic y-y and z-z axes, respectively
The elastic (Wel) and plastic section moduli (Wpl) about both principal axes are given in the tables.
3.4 Torsional constant (IT)
For circular hollow sections:
IT = 2I
For square, rectangular and elliptical hollow sections:
where:
I is the second moment of area of a CHS
t is the thickness of the section
p is the mean perimeter length
For square and rectangular hollow sections p = 2 [(b – t) + (h – t)] – 2 Rc (4 -π)
For elliptical hollow sections:
Ap is the area enclosed by the mean perimeter
For square and rectangular hollow sections Ap = (b – t) (h – t) – Rc2 (4 - π)
For elliptical hollow sections:
Rc is the average of the internal and external corner radii
3.5 Torsional section modulus (Wt)
For circular hollow sections:
Wt = 2 Wel
For square, rectangular and elliptical hollow sections:
where:
Wel is the elastic modulus and IT, t, Ap and p are as defined in Section 3.4.
4.1 General
In EN 1993-1-1[1], effective section properties are required for the design of members with Class 4 cross-sections. In this website, effective section properties are given for sections subject to compression only and bending only.
4.2 Effective section properties of members subject to compression
The effective cross section properties of Class 4 cross-sections are based on the effective widths of the compression parts.
The effective cross-sectional area Aeff of Class 4 sections in compression is calculated in accordance with EN 1993-1-1[1], 6.2.2.5 and EN 1993–1–5 [1], 4.3 and 4.4.
The effective section properties tables list the sections that can be Class 4 and the identifier ‘W’, ‘F’ or ‘W, F’ indicates whether the section is Class 4 due to the web, the flange or both. In rectangular hollow sections subject to bending about the major axis, the flanges are the short sides and the webs are the long sides.
The effective area of the section is calculated from:
For rectangular hollow sections and square hollow sections:
Aeff = A - 2 tf (1 - ρf ) cf - 2 tw (1 - ρw) cw
For circular hollow sections:
Effective areas are not tabulated for circular hollow sections in these tables. EN 1993-1-1[1] 6.2.2.5(5) refers the reader to EN 1993-1-6 [1].
For elliptical hollow sections:
Effective areas are not tabulated in these tables, but may be calculated as follows in accordance with Reference 4.
where:
De is the equivalent diameter h2 / b
Expressions for the reduction factors ρf, ρw and ρ are given in EN 1993-1-5 [1], 4.4.
The ratio of effective area to gross area (Aeff / A) is also given in the tables to provide a guide as to how much of the section is effective. Note that although EN 1993-1-1[1] classifies some sections as Class 4, their effective area according to EN 1993-1-5 [1] is equal to the gross area.
4.3 Effective section properties of members subject to pure bending
The effective cross section properties of Class 4 cross sections are based on the effective widths of the compression parts.
The effective cross-sectional properties for Class 4 sections in bending have been calculated in accordance with EN 1993-1-1 [1], 6.2.2.5 and EN 1993-1-5 [1], 4.3 and 4.4.
Cross-section properties are given for the effective second moment of area Ieff and the effective elastic section modulus Wel,eff. The identifier ‘W’ or ‘F’ indicates whether the web or the flange controls the section Class 4 classification.
Equations for the effective section properties are not shown here because the process for determining these properties requires iteration. Also the equations are dependent on the classification status of each component part.
For cross sections with a Class 3 web and Class 1 or 2 flanges, an effective plastic modulus Wpl,eff can be calculated, following the recommendations given in EN 1993-1-1 [1], 6.2.2.4 (1).
For the range of sections covered by this software, only a limited number of the hollow sections can be used with an effective plastic modulus Wpl,eff, when subject to bending alone.
5.1 General
(Reference EN 1993-1-1 unless otherwise noted)
The design resistances given in the tables have been calculated using exact values of the section properties calculated from the specified dimensions. The values obtained have then been rounded to 3 significant figures.
Design resistance tables are given for hot finished steel in grade S355, S420 and S460.
The following partial factors for resistance in the relevant National Annexes have been used throughout these tables for the calculation of the design resistances.
Table 5.1
| Partial resistance factor | Dutch, French & UK National Annexes |
|---|---|
| γM0 for the resistance of cross sections | 1.0 |
| γM1 for the resistance of members | 1.0 |
5.2 Yield strength
(Reference 3.2.1)
The member resistance tables are based on the following values of yield strength fy.
(Reference EN 10210-1)
Table 5.2
| Steel grade | Maximum thickness less than or equal to (mm) |
Yield strength fy (N/mm2) |
|---|---|---|
| S355 | 16 | 355 |
| 40 | 345 | |
| S420 | 16 | 420 |
| S460 | 16 | 460 |
The above values are those given in the product standard EN 10210-1[1] for hot-finished hollow sections.
6.1 Design resistance of cross-section Nc,Rd
(Reference 6.2.4 ; 6.2.4 (2))
The design resistance is given by:
(i) For Class 1, 2 or 3 cross-sections:
(ii) For Class 4 cross-sections:
where:
A is the gross area of the cross-section
fy is the yield strength
Aeff is the effective area of the cross-section in compression
γM0 is the partial factor for resistance of cross-sections (γM0 = 1.0 as given in the National Annexes).
For Class 1, 2 and 3 cross-sections, the value of Nc,Rd is the same as the plastic resistance, Npl,Rd given in the tables for axial force and bending, and is therefore not given in the compression tables.
For Class 4 sections, the value of Nc,Rd can be calculated using the effective areas provided in the software. The values are not shown in the tables.
Sections that are Class 4 under axial compression are marked thus *. The sections concerned are:
Square hollow sections, where c / t > 42 e and c = h – 3 t
Rectangular hollow sections, where cw / t > 42 e and cw = h – 3 t
Circular hollow sections, where d / t > 90 e 2
where:
h is the overall depth of the cross section
t is the thickness of the wall
e = (235 / fy)0.5
Elliptical hollow sections, where
(See Reference 5)
where:
De is defined in Section 4.2
6.2 Design buckling resistance Nb,Rd
(References 6.3.1 ; 6.3.1.1)
Design buckling resistances for flexural buckling are given in the tables.
The design flexural buckling resistances Nb,y,Rd and Nb,z,Rd depend on the non-dimensional slenderness
, which in turn depends on:
- The buckling lengths (Lcr) given at the head of the table
- The properties of the cross-section.
The non-dimensional slenderness has been calculated as follows:
(References 6.3.1.3)
For Class 1, 2 or 3 cross-sections:
for y-y axis buckling
for z-z axis buckling
For Class 4 cross-sections:
for y-y axis buckling
for z-z axis buckling
where:
Lcr,y, Lcr,z are the buckling lengths for the y-y and z-z axes respectively
iy, iz are the radii of gyration about the y-y and z-z axes respectively
The tabulated buckling resistance is only based on Class 4 cross-section properties when the value of the force is sufficient to make the cross section Class 4 under combined axial force and bending. The value of n (= NEd / Npl,Rd) at which the cross-section becomes Class 4 is shown in the tables for axial force and bending. Otherwise, the buckling resistance is based on Class 3 cross-section properties. Tabulated values based on the Class 4 cross section properties are printed in bold type.
For Class 4 circular hollow sections, EN 1993-1-1 refers the user to EN 1993-1-6 [1]. Resistance values for these sections have not been calculated and the symbol $ is shown instead.
For Class 4 elliptical hollow sections, the design buckling resistance has been taken as the greater of:
1. The design buckling resistance based on an effective area (see Section 4.2) and
2. The design buckling resistance based on the gross area, but reducing the design strength such that the section remains Class 3. The reduced design strength fy,reduced is given by:
De is defined in Section 4.2.
7.1 Circular and square hollow sections
6.2.8 (2)
The design resistances for bending Mc,Rd and shear Vc,Rd are tabulated for circular and square hollow sections in S355, S420 and S460 (hot finished only) steel. No values have been calculated for S275 circular and square hollow sections.
The design resistances for bending about the principal axes of the cross section, Mc,Rd are given by:
(i) For Class 1, 2 cross-sections:
Mc,y,Rd =
Mc,z,Rd = 
(ii) For Class 3 cross-sections with a Class 1 or 2 flange:
Mc,y,Rd = 
where: (Ref. 6.2.6 [3]):
Wpl,eff,y is calculated according to EN 1993-1-5[1], 4.4 .
(iii) For other Class 3 cross-sections:
Mc,y,Rd = 
Mc,z,Rd = 
(iv) For Class 4 cross-sections:
Mc,y,Rd = 
Mc,z,Rd = 
The design shear force resistance Vc,Rd is given by (Ref 6.2.6 [2])
Vc,Rd =
where: (Ref. 6.2.6 [3])
Av is the shear area
Av = 2 A / π for circular hollow sections
Av = A / 2 for square hollow sections
fy is the design yield strength
γM0 is the partial factor for resistance of cross sections (γM0 = 1.0 as given in the National Annexes).
The second moment of area (I) is included in the tables because it is required for deflection checks.
For Class 4 CHS, EN 1993-1-4 [1] refers the user to EN 1993-1-6[1].
Moment resistance values for these sections have not been calculated and the symbol $ is shown instead. 6.2.6 [3]
Where the design shear force is high (> 50% of the shear resistance), a reduced value of resistance for bending Mc,b,Rd and shear Mc,z,Rd should be calculated. No values are tabulated in this publication. Values of the design shear resistance, Vc,Rd are given in the tables of web bearing and buckling resistance.
7.2 Rectangular hollow sections
The following information is presented in the tables for rectangular hollow sections in S355, S420 and S460 steel. No values have been calculated for S275 rectangular hollow sections.
(i) Design resistance for bending about the y-y and z-z axes and design shear resistance:
The values of Mc,y,Rd and Mc,z,Rd and Vc,Rd have been calculated as detailed in Section 8.1(a) of Steel Building Design: Design Data - 'Blue Book' (SCI publication P363)[12] and Section 7.1 respectively, with the shear area for bending about the major axis taken as Av = A h / (b + h).
(ii) The section classification given in the tables applies to members subject to bending only about the appropriate axes. Sections may be Class 4 for pure bending about the y-y or z-z axis. It should be noted that a section may be Class 4 when bending about the z-z axis and not Class 4 when bending about the y-y axis.
(iii) The limiting length, Lc, is the length above which the design buckling resistance moment is reduced below the cross-sectional resistance due to lateral torsional buckling. The value of the limiting length is that at which the slenderness  LT = 0.4, which is the value of
  LT,0 recommended in the National Annexes.
The slenderness for lateral torsional buckling has been calculated as follows:
 LT =
LT = 
And for RHS the elastic critical buckling moment is:
Mcr = 
From these expressions, conservatively assuming C1 = 1.0, the limiting length above which LTB needs to be checked can be derived as follows:
Lc = 
For lengths up to the limiting length, Mb,Rd is equal to Mc,y,Rd.
In the resistance tables for bending alone, no values of Mb,Rd are tabulated for lengths in excess of the limiting length. Values for lengths in excess of the limiting length are provided in the tables of combined bending and compression. (Ref 6.2.6 (3))
(iv) The second moment of area (I) is repeated in the tables as it is required for deflection checks.
7.3 Elliptical hollow sections
The following information is presented in the tables for hot rolled elliptical hollow sections in S355 steel.
(i) Design resistance for bending about the y-y axis
For Class 1, 2 and 3 sections, the design resistances are calculated in accordance with Section 7.1.
(ii) Design resistance for bending about the z-z axis
For Class 1, 2 and 3 sections, the design resistances are calculated in accordance with Section 7.1.
For Class 4 sections, the design resistances are calculated as if the section were Class 3, using a reduced design strength such that the section remains Class 3.
The reduced design strength is taken as 
where De,minor is the equivalent diameter for buckling about the minor axis and is given by:
De,minor = 
(iii) Design resistance for shear
The design resistance for shear in the major axis of the elliptical section is calculated in accordance with Section 7.1. For an elliptical section, the shear area Av is taken in accordance with Reference 7 as:
Av = (2 h – 2 t) t
(iv) Limiting length, Lc
The limiting length, Lc above which the design buckling resistance moment is reduced below the cross-sectional resistance due to lateral torsional buckling has been calculated in accordance with Section 7.2.
EN 1993-1-5[1] does not cover the resistance to transverse forces for hollow sections. Therefore in these tables the approach previously presented in Steelwork Design Guide to BS 5950-1:2000, Volume 1 - Section properties member capacities (SCI publication P202)[8] has been adopted and is presented below in terminology consistent with EN 1993-1-1[1].
8.1 Bearing resistance
The bearing resistance, FRd,bearing, of the unstiffened web may be calculated using the factors C1 and C2 in the tables, using:
FRd,bearing = (b1 + n k)2 t fy / γM0
= b1 C2 + C1 (Resistance table notation)
where:
b1 is the effective bearing length (see figures below)
n = 5, for continuous web over bearing
n = 2, for end bearing
k = t for hollow sections
t is the wall thickness
fy is the yield strength.
Figure 8.1 Figure illustrating examples of stiff bearing length, b1

The bearing factor C1 represents the contribution from the flanges, adjacent to both webs, and is given by:
| C1 = 2 n k t fy / γM0 | Generally |
| C1 = 2 × 5 t 2 fy / γM0 | For a section continuous over the bearing |
| C1 = 2 × 2 t 2 fy / γM0 | For end bearing |
The bearing factor C2 is equal to 2 t fy / γM0 representing the stiff bearing contribution for both webs.
8.2 Buckling resistance
The buckling resistance FRd,buckling of the two unstiffened webs is given by:
FRd,buckling = (b1 + n1) 2 t χ fy / γM1
= b1 C2 + C1 (Resistance table notation)
where:
b1 is the stiff bearing length
n1 is the length obtained by dispersion at 45° through half the depth of the section
t is the wall thickness
χ is the reduction factor for buckling resistance, based on the slenderness as given in Section 6.2.
Unless loads or reactions are applied through welded flange plates, the additional effects of moments in the web due to eccentric loading must be taken into account, which will result in lower buckling values.
The buckling factor C2 is the stiff bearing component factor and is equal to C1 / h
The buckling factor C1 is the portion of (n1 t χ fy / γM1) due to the beam alone.
C1 = 4 D t χ fy /2 γM1 for welded flange plates
C1 = 4 F for non-welded flange plates
where:
F is the limiting force in each web (derived below).
The factor of 4 allows for two webs and dispersion of load in two directions and applies to a member that is continuous over a bearing or an end bearing member with a continuously welded sealing plate.
For non–welded flange plates, the limiting force F depends on the equivalent eccentricity of loading from the centreline of the web given by:
e = 0.026 b + 0.978 t + 0.002 h
This expression has been derived from research [9]

If the flange is considered as a fixed-ended beam of length b - t, the two forces F create a fixed end moment M;
M = 
and thus the moment at mid-height of the web Mz can be found as follows [11]:


where:
a = h / b
Using the interaction criterion 
The limiting value of F is given when the left hand side of this criterion = 1.
If the length of the wall resisting F and M is h / 2, given by a 45° dispersal in one direction, A = h t /2 and Wel,z = h t 2 / 12. Substituting these values, introducing k = Mz / F, and rearranging, the limiting value becomes:
F = 
where:
| nb | =  |
| k | is given by the expression for Mz / F above |
8.3 Shear resistance
The shear resistance is determined in accordance with Section 7.1, 7.2 and 7.3. (Ref 6.2.6 [2])
Generally, members subject to axial compression forces and bending should be verified for cross section resistance (EN 1993-1-1[1], 6.2.9) and for member buckling resistance (EN 1993-1-1[1], 6.3.3.(4)).
The relevant parameters required to evaluate the interaction equations given in the above clauses are presented in tabular form.
The tables are applicable to members subject to combined tension and bending and to members subject to combined compression and bending. However, the values in the tables are conservative for tension, as the more onerous compression section classification limits have been used for calculating resistances to axial force.
Tables are given for cross-section resistances and for member buckling resistances, as explained below.
9.1 Cross-section resistance
EN 1993-1-1[1] For Class 1, 2 and 3 cross sections the following conservative approximation may be used:
(Ref 6.2.1[7])
 |
Eq (6.2) |
For CHS, SHS and RHS, values of Npl,Rd, Mc,y,Rd and Mc,z,Rd are given in the tables. The section classification depends on the axial force applied and therefore Mc,Rd values are given for different values of NEd / Npl,Rd. The values of these resistances have been calculated as described in the following sections.
No Mc,y,Rd and Mc,z,Rd values are given for combined axial force and bending on Class 4 sections. Refer to EN 1993-1-1, 6.2.9.3(2).
The symbol * denotes that the section is Class 4 when fully stressed under axial compression only.
For elliptical hollow sections, values of Npl,Rd, Mc,y,Rd and Mc,z,Rd are given in the tables.
If an elliptical hollow section is Class 4, the design compression and bending resistances are calculated based on the area and section modulus appropriate for a Class 3 section, using a reduced design strength such that the section is Class 3. The reduced design strength is calculated using the expression given in Section 6.2.
(a) Design resistance for axial force
Npl,Rd = 
where:
A is the gross area of the cross-section
γM0 is the partial factor for cross-sections
It should be noted that Npl,Rd for a Class 4 elliptical hollow section is based on the gross area and a reduced design strength, as described above.
(b) Design resistances for bending about the principal axes of the cross section
The design resistances for bending about the major and minor axes, Mc,Rd (for CHS and SHS), Mc,y,Rd and Mc,z,Rd (for RHS and elliptical hollow sections) have been calculated as in Section 7 using Wpl,y, Wel,y and Wpl,z and Wel,z as appropriate. No values are given for the reduced resistance in the presence of high shear. (Ref 6.2.5 (2))
Mc,Rd values for Class 4 cross sections are not given in the tables. For checks of Class 4 cross sections, see EN 1993-1-1[1], 6.2.9.3(2).
If an elliptical hollow section is Class 4, the design resistances are calculated based on the section modulus appropriate for a Class 3 section and a reduced design strength such that the section is Class 3. When subject to combined axial compression and bending, elliptical hollow sections are classified for axial compression, which may be more onerous than major axis bending.
The symbol ~ indicates that the section is Class 4 for a given value of NEd / Npl,Rd.
The symbol $ indicates that the section is Class 4 and that it would be overloaded due to compressive axial force alone i.e. the section is Class 4 and NEd > Aeff fy for the given value of NEd / Npl,Rd.
The Class 2 and Class 3 limits for the section subject to bending and compression are the maximum values of NEd / Npl,Rd up to which the section is either Class 2 or Class 3, respectively. The Class 2 limit is given in bold type.
Limits are not given for elliptical hollow sections; the classification depends purely on the geometry of the section. (Ref 5.5.2 (8))
As an alternative to Equation (6.2) for Class 1 and 2 CHS, SHS and RHS sections a less conservative criterion may be used as follows:
(Ref 6.2.9.1(2))
MEd = MN,Rd Eq (6.31)
Values of MN,Rd are given in the tables.
(c) Design moment resistance reduced due to axial force
The reduced design resistances for bending have been calculated as follows:
(i) Circular hollow sections
No information is available in EN 1993-1-1 or EN 1993-1-6[1] for the resistance of cross sections of circular hollow sections under combined axial force and bending. The values of MN,Rd have been calculated using the methodology adopted in Steelwork Design Guide to BS 5950-1: 2000, Volume 1 - Section properties member capacities (SCI publication P202)[8]. For Class 1 and 2 sections, the expression is as follows:
MN,Rd = 
where:
n = NEd / Npl,Rd
(ii) Rectangular and square hollow sections (Ref 6.2.9.1(5))
For bending about the y-y axis:
MN,y,Rd =  |
but ≤ Mpl,y,Rd | Eq (6.39) |
where:
| aw | =  but ≤ 0.5 but ≤ 0.5 |
| Mpl,y,Rd | is the plastic resistance moment about the y-y axis |
| n | is the ratio NEd / Npl,Rd |
Because the values of MN,y,Rd are only valid for Class 1 and Class 2 sections, no values are shown when NEd / Npl,Rd exceeds the limit for a Class 2 section (shown as the symbol '–' in the tables).
For square hollow sections, the reduced moment resistance is the same for both axes, and is displayed as MN,Rd.
For bending about the z-z axis (Ref 6.2.9.1(5)):
MN,z,Rd =  |
but ≤ Mpl,z,Rd | Eq (6.40) |
where:
| Af | =  but ≤ 0.5 but ≤ 0.5 |
|---|---|
| Mpl,z,Rd | is the plastic resistance moment about the z-z axis |
| n | is the ratio NEd / Npl,Rd |
Because the values of MN,z,Rd are only valid for Class 1 and Class 2 sections, no values are shown when NEd / Npl,Rd exceeds the limit for a Class 2 section (shown as the symbol '–' in tables).
9.2 Member buckling resistance
Interaction equations (6.61) and (6.62) from EN 1993-1-1 [1], 6.3.3(4) must be satisfied for members subject to combined axial compression and bending. To check these interaction equations the following parameters given in (a), (b) and (c) are needed:
These are given in the tables as Nb,y,Rd and Nb,z,Rd for rectangular hollow sections and elliptical hollow sections, and as Nb,Rd for circular and square hollow sections. They are the compression resistances for buckling about the y-y and the z-z axis respectively. For CHS, SHS and RHS, the adjacent n limit (i.e. NEd / Npl,Rd) ensures that the section is not Class 4 and has been calculated as in Section 6.1. For Class 4 elliptical hollow sections, the design compression is calculated based on the gross area, using a reduced design strength such that the section is Class 3.
When subject to combined axial compression and bending, elliptical hollow sections are classified for axial compression, which may be more onerous than major axis bending.
This term is given in the table as Mb,Rd for rectangular and elliptical hollow sections. For rectangular hollow sections, values are given for two NEd / Npl,Rd limits. The higher limit ensures the section is Class 3 and the lower limit (in bold) ensures the section is Class 2, Mb,Rd is calculated accordingly. The reduction factor χLT is calculated for the 'rolled sections' case using the following buckling curves, with  LT,0 = 0.4 (Section 8.1, as recommended in Reference 6) and ß = 0.75.
Table 9.1
| Cross-section | Limits | Buckling curve |
|---|---|---|
| Hot-finished hollow section | h / b = 2.0 | b |
| 2.0 < h / b = 3.1 | c |
For circular and square hollow sections, Mb,Rd is not applicable and is therefore not given in the tables.
Mz,Rk may be based on the elastic or plastic modulus, depending on the section classification, as shown in Table 6.7 of EN 1993-1-1[1]. Values of fy Wel,z are given (for Class 4 elliptical hollow sections, a reduced value of fy is used with the elastic modulus). Values of fy Wpl,z are given as Mc,z,Rd (Mc,Rd for CHS) in the tables for cross section resistance check.
In addition, values of fy Wel,z and Npl,Rd are given in the tables for completeness.
The UK and German National Annexes permit the use of either Annex A or Annex B of EN 1993-1-1 [1] to calculate the interaction factors k for circular, square and rectangular hollow sections. The French National Annex permits the use of Annex A only and the Dutch National Annex permits the use of Annex B only.
For CHS, SHS and RHS, the symbol * denotes that the cross section is Class 4 under axial compression only (due to the web becoming Class 4). Under combined axial compression and bending, the class of the cross-section depends on the axial force, expressed in terms of n (= NEd / Npl,Rd). Values of n are given, up to which the cross-sections would be Class 2 or Class 3.
The limits in normal and bold type are the maximum values up to which the section is either Class 3 or Class 2, respectively. The tabulated resistances are only valid up to the given NEd / Npl,Rd limit.
For certain rectangular hollow sections, webs and flanges are Class 4. In these cases section resistances provided are based on effective section properties. These sections are indicated by the γ symbol.
- EN 1993: Eurocode 3: Design of steel structures.
EN 1993-1-1:2005: Part 1-1: General rules and rules for buildings.
EN 1993-1-5:2006: Part 1-5: Plated structural elements.
EN 1993-1-6:2007+A1:2017: Design of steel structures - Strength and Stability of Shell Structures.
EN 1993-1-8:2005 Incorporating Corrigenda December 2005, September 2006, July 2009 and August 2010: Design of joints.
BSI, 2005, 2006, 2007, 2010. - EN 10210: Hot finished structural hollow sections of non-alloy and fine grain structural steels.
EN 10210-1:2006: Part 1: Technical delivery requirements.
EN 10210-2:2006: Part 2: Tolerances, dimensions and sectional properties.
BSI, 2006. - - Intentionally left blank
. - CHAN, T. M. and GARDNER, L.N 10219
Compressive resistance of hot-rolled elliptical hollow sections.
Engineering Structures, Vol 30, No 2, pages 522-532.
Elsevier Ltd, 2008.
- GARDNER, L. and CHAN, T.
Cross section classification of elliptical hollow sections.
Steel and Composite Structures, Vol. 7, No. 3, pages 185-200.
Techno-Press, 2007.
- RONDAL, J., WÜRKER, K.-G., DUTTA, D., WARDENIER, J. and YEOMANS, N.
Structural stability of hollow sections, CIDECT Design Guide 2.
TÜV Verlag, 1996.
Available from www.CIDECT.com.
- GARDNER, L., CHAN, T. M. and WADEE, M A.
Shear resistance of elliptical hollow sections.
Proceedings of the Institution of Civil Engineers - Structures and Buildings, Vol 161, Issue 6, December 2008.
ICE, 2008.
- Steelwork design guide to BS 5950-1:2000. Volume 1: Section properties, member capacities, 7th edition (P202),
The Steel Construction Institute and The British Constructional Steelwork Association Ltd, 2007.
Available from Steelbiz or SCI Shop.
- MORREL, P. J. B.
The behaviour of rectangular hollow section steel beams under concentrated flange loading.
PhD Thesis, CNAA, Brighton University, January 1971.
- - Intentionally left blank.
- KLEINLOGEL, A.
Rigid frame formulas (translated from German: page 418).
Fredrick Ungar Publishing Co., 1958.
- Steel Building Design: Design Data 'Blue Book' (P363),
The Steel Construction Institute and The British Constructional Steelwork Association Ltd, 2015.
Available from Steelbiz.
- EN 1090-2:2008 Execution of steel structures and aluminium structures. Technical requirements for the execution of steel structures.
BSI, 2008.
Tolerances
Rolling Tolerances to EN 10210-2:1997 for hot-finished Square and Rectangular Hollow Sections
| Designation | Property | Tolerance | ||
|---|---|---|---|---|
|
|
Depth or width D or B | ±1.0% with a min of ±0.5 mm | ||
| Thickness t | Welded | –10% | ||
| Seamless | –10% but between 10% and 12.5% may occur over not more than 25% of the circumference |
|||
| Note: Positive deviation is limited by mass tolerance | ||||
| Squareness of side | 90º ±1º | |||
| External corner profile | 3t max at each corner | |||
|
|
Concavity / convexity x | ±1% of the side, measured independently of the tolerance on the outside dimension |
||
|
Section is placed on a |
Twist v | 2 mm plus 0.5 mm per m max | ||
| Measured at the centre of the length | Straightness (x or y direction) |
0.20% L | ||
| Mass per unit length | Mass of section | Welded | ±6.0% on individual lengths | |
| Seamless | +8.0% -6% on individual lengths | |||
| Standard | Length L | +150 mm | –0 mm | |
Rolling Tolerances to EN 10210-2:2006 for hot-finished Circular Hollow Sections
| Designation | Property | Tolerance | ||
|---|---|---|---|---|
|
|
Outside diameter D | ±1.0% with a min of ±0.5 mm and a max of ±10 mm |
||
| Thickness t | Welded | –10% | ||
| Seamless |
–10% but between 10% and 12.5% |
|||
| Note: Positive deviation is limited by mass tolerance | ||||
| Measured at the centre of the length |
Straightness (x or y direction) | 0.20% L | ||
| Mass per unit length | Mass of section | Welded | ±6.0% on individual lengths | |
| Seamless | +8.0% –6% on individual lengths | |||
| Standard | Length L | +150 mm | –0 mm | |
Rolling Tolerances to EN 10210-2:1997 for hot-finished Elliptical Hollow Sections
| Designation | Property | Tolerance |
|---|---|---|
|
|
Outside dimension D or B | ±1% with a min of ±0.5mm |
| Thickness t | –10% Note. Positive deviation limited by mass tolerance |
|
| Twist V | 2mm +0.5mm/m length max. | |
| Straightness e | Maximum 0.2% of the total length | |
| Mass M | ±6% on individual lengths | |
| Length | +150mm / –0mm |
EN-Construction-Contact-Tubes-Technical Blue Book
Structural Hollow Sections Technical Team
Tata Steel
Weldon Road
Corby
Northants
NN17 5UE























































































 and
and 
 (Ref 6.3.2.3(1))


