


EN-construction-services-guarantees-platinum-plus
Platinum Plus system guarantee
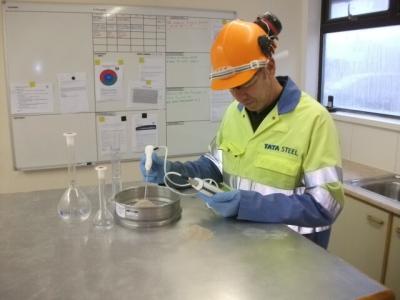
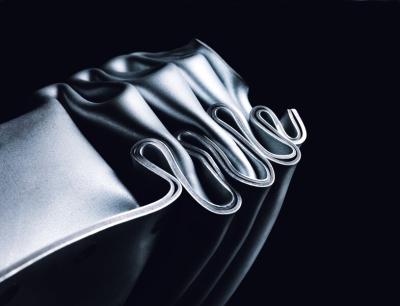
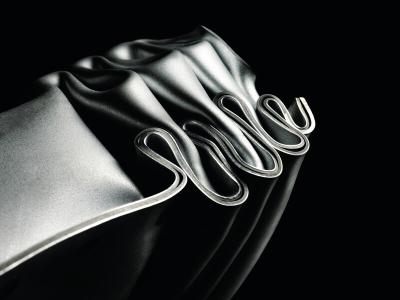
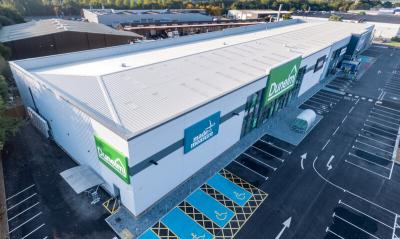
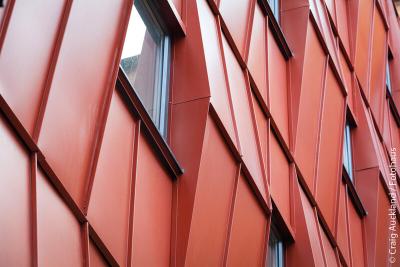
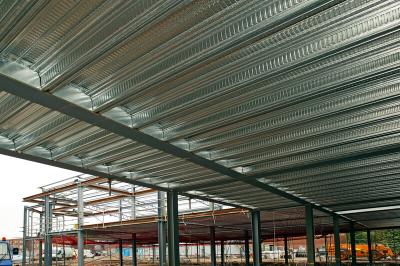
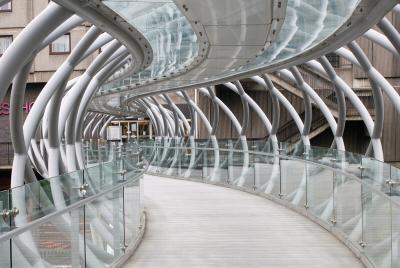
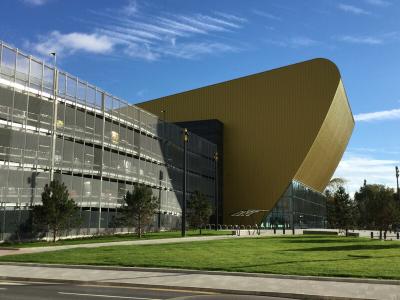
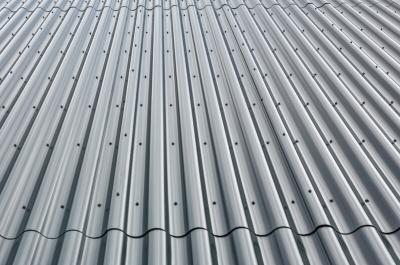
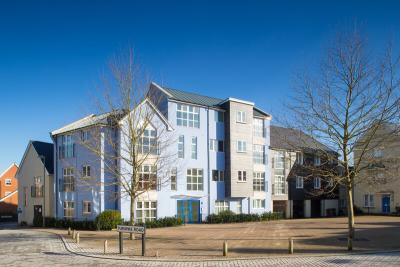
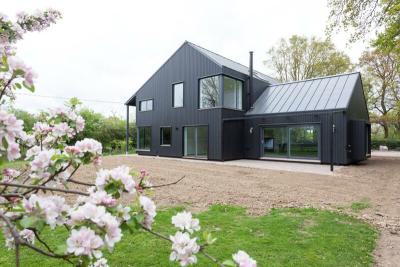
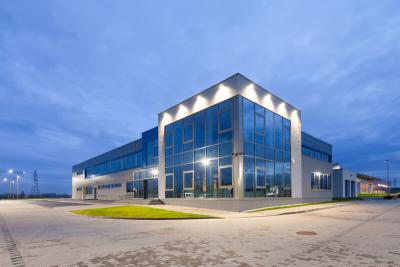
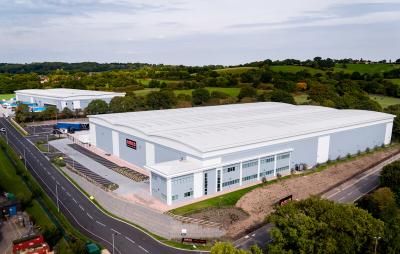
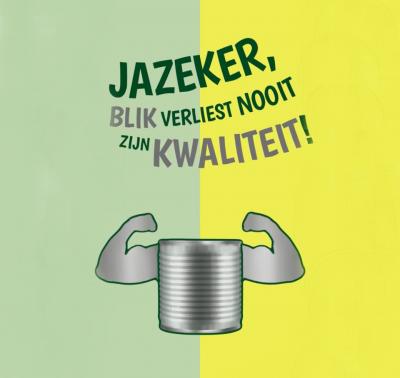
Platinum® Plus is a system guarantee for 25 years, that covers durability, structural and thermal performance.
<a href=/about-us/at-a-glance>Tata Steel is one of the world’s most geographically diversified steel producerswith operations in...</a>
<a href=/about-us/our-strategy>Our mission is to build the leading European steel business thatis sustainable in every sense
</a>
<a href=/about-us/organisation>Information about the Executive Members and the Board
</a>
<a href=/about-us/our-people>We recognise that our people are the primary source of our competitiveness.
</a>
<a href=/about-us/innovation/open-innovation>At Tata Steel we want to maintain our position as one of the world’s leading steel companies. To d...</a>

<a href=/about-us/our-heritage>Tata Steel (in India) was established in 1907 and the first ingot of steel was made at Jamshedpur in...</a>
<a href=/about-us/sites-and-facilities/service-centres/benelux-multisteel>MultiSteel offers one of the broadest multi-metal ranges in Europe, including HRP, CRC, HDG, DSP and...</a>
<a href=/about-us/sites-and-facilities/service-centres/finland-naantali>Naantali Steel Service Centre Oy is Finland’s leading steel service centre. Its large production c...</a>
<a href=/about-us/sites-and-facilities/service-centres/france-unitol>Our Unitol steel service centre in Corbeil-Essonnes, France, offers one of the broadest ranges of st...</a>
<a href=/about-us/sites-and-facilities/service-centres/germany-gelsenkirchen>Our Gelsenkirchen plant, producing slit coils and cut-to-size sheets, include slitters and blanking ...</a>
<a href=/about-us/sites-and-facilities/service-centres/heavy-gauge-europe-service-centre-maastricht-feijen>Our service centre in Maastricht (Feijen) is part of our highly specialised distribution service for...</a>
<a href=/about-us/sites-and-facilities/service-centres/heavy-gauge-decoiling-uk-llanwern>Customers in the lifting and excavating, energy and power, ship building and heavy engineering marke...</a>
<a href=/about-us/sites-and-facilities/service-centres/ireland-lisburn>The Ireland Service Centre processes and distributes the full range of Tata Steel's flat products fr...</a>
<a href=/about-us/sites-and-facilities/service-centres/spain-layde>Layde steel slu is located in the north of Spain, the Basque Country.
For the transformation of c...</a>
<a href=/about-us/sites-and-facilities/service-centres/sweden-norway-halmstad-nst>Halmstad Steel Service Centre and Norsk Stål Tynnplater are the leading steel service centres in Sc</a>
<a href=/about-us/sites-and-facilities/service-centres/uk-steelpark-service-centre>Supplying an extensive range of sheets and blanks of cold rolled, metallic coated and hot rolled spe...</a>
<a href=/about-us/sites-and-facilities/service-centres>Tata Steel’s extensive distribution network is the second largest in Europe.These downstream facil...</a>
<a href=/about-us/sites-and-facilities/plating>Tata Steel's integrated business Plating is the world's leading expert in electroplating for technic...</a>
<a href=/health-and-safety/access-and-safety-ijmuiden/regulations>HSSEregulations for Tata Steel in IJmuiden
</a>

<a href=/health-and-safety/access-and-safety-ijmuiden/traffic>Within Tata Steel IJmuiden we have established rules for "safe driving".
Every year thousands of ...</a>

<a href=/health-and-safety/access-and-safety-ijmuiden/safety-topics>Safety topics for site users
</a>

<a href=/health-and-safety/access-and-safety-ijmuiden>Start pageHSSEfor visitorsTata Steel in IJmuiden
</a>
<a href=/about-us/sites-and-facilities/nebam-shipping-agency>Nebam is the shipping agency of Tata Steel providing full Shipping and Logistics Services in the Net...</a>

<a href=/about-us/sites-and-facilities/shapfell-lime>Our high performance lime products meet the requirements of a wide range of applications.We produce ...</a>
<a href=/about-us/sites-and-facilities/certificates>List of approval certificates by Country covering Tata Steel's European business entities and sites.</a>
<a href=/about-us/sites-and-facilities>Sites and Facilities of Tata Steel in Europe
</a>

<a href=/automotive/key-products/magizinc-auto>MagiZinc®Auto: advanced hot-dip galvanisedcoating for inner parts and outer panels.
</a>
<a href=/automotive/key-products/hyperform>Hyperform®: extra formability for lightweight AHSS design.Tackling weight, costs and performance si</a>

<a href=/automotive/key-products/plt>Prime Lubrication Treatment:advanced surface treatment for smooth processing of automotive panels.
</a>
<a href=/automotive/key-products/xpf>XPF® for easy lightweighting and improved energy absorption in complex structural vehicle parts.
</a>

<a href=/automotive/key-products/serica-flo>SericaFLO®:a premium surface finish for a market-leading paint appearance.
</a>

<a href=/automotive/key-products/hilumin>HILUMIN®for cylindrical battery cell casings in electric vehicles.
</a>

<a href=/automotive/key-products/hi-lite>Hi-Lite:a thin non-oriented electrical steel for efficient and high-performance electric motors.
</a>

<a href=/automotive/key-products>Key products in the Automotive product portfolio
</a>
<a href=/automotive/products/hot-rolled/forming>Hot-rolled steel for cold forming is used for bending and deep drawing.
Tata Steel’s forming gr...</a>
<a href=/automotive/products/hot-rolled/high-strength-steel>Tata Steel’s high-strength, low-alloy grades offer formability and strength for demanding applicat...</a>
<a href=/automotive/products/hot-rolled/advanced-and-ultra-high-strength-steel>Tata Steel’s range of versatile hot-rolled advanced and ultra high-strength steels has been develo...</a>
<a href=/automotive/products/hot-rolled/heat-treatable-steel>Tata Steel offers a choice of hot-rolled heat-treatable steels
Boron steels offer advantages acro...</a>
<a href=/automotive/products/hot-rolled>Hot-rolled steel offers performance, versatility and value. Our hot-rolled strip steel range include...</a>
<a href=/automotive/products/direct-rolled/high-strength-steel>The Ymagine®range is available in five high-strength, low-alloy (HSLA) grades that are easy to proc...</a>
<a href=/automotive/products/cold-rolled/forming>Cold-rolled steel for cold forming and deep drawing is available in a range of grades.Each grade is ...</a>
<a href=/automotive/products/cold-rolled/high-strength-steel>Tata Steel offers a range of cold-rolled steels for applications requiring high strength without the...</a>
<a href=/products/cold-rolled/advanced-and-ultra-high-strength-steel>Our cold-rolled dual phase and hot forming grades include advanced (AHSS)and ultra high-strength ste...</a>
<a href=/automotive/products/cold-rolled>Tata Steel offers a comprehensive range of cold-rolled steel comprising both continuously-annealed a...</a>
<a href=/automotive/products/metallic-coated/forming>Our cold-rolled forming steels are available in a wide range of grades and corrosion-resistant coati...</a>
<a href=/automotive/products/metallic-coated/ahss-uhss>Dual-phase steels are an AHSS steel that combine high yield strength with good ductility – ensurin...</a>

<a href=/automotive/products/metallic-coated>Tata Steel offers a wide choice of metallic coated steel. Our product range includes forming and str...</a>
<a href=/automotive/products/electro-plated-steel>Tata Steel is a committed partner within the automotive industry. Combining ourmaterials, design eng...</a>

<a href=/products/electrical-steel>Surahammars Bruk, a Tata Steel enterprise, offers a comprehensive range of electrical steel grades a...</a>
<a href=/automotive/products/precision-and-specialist-tubes>Manufactured at our plants in the Netherlands, our welded steel, narrow tolerance, high quality prec...</a>
<a href=/automotive/products>Wide, multi-productportfolio for a lowertotal cost of ownership.
</a>

<a href=/automotive/applications/e-motors>
Preferred partner for high efficiency thin gauge electrical steel enabling next generation designs</a>

<a href=/automotive/applications/energy-storage>Enabling the transition to electrified vehicles by providing solutions for cylindrical battery casin</a>

<a href=/automotive/applications/seating>
Your expert partner in steel design for seating.
</a>

<a href=/automotive/applications/body-in-white>
Supporting you from concept to series production. Increased energy absorption in BIW parts, reduci...</a>

<a href=/automotive/applications/chassis-and-suspension>
Helping you strike the balance in chassis design.
</a>

<a href=/automotive/applications/outer-panels>SericaFLO for excellent paint appearance on outer panels.
</a>
<a href=/automotive/applications>
Tata Steel offers a wide, multi-product portfolio of strip, tubes and forging steels, including a ...</a>

<a href=/automotive/industry-themes/sustainability/decarbonisation>
Electrification will see significant reductions inuse-phase emissions.
</a>

<a href=/automotive/industry-themes/sustainability/resource-efficiency>
The circular economy is based on maximising the use of resources and minimising waste.
</a>

<a href=/automotive/industry-themes/sustainability>Working towards vehicles that are fully sustainable
</a>

<a href=/automotive/industry-themes/electrification>Steels for the most important components of the electric vehicle
</a>

<a href=/automotive/industry-themes/digitalisation>Smarter technologies and services for a sustainable automotive value chain
</a>

<a href=/automotive/industry-themes>
Many of our products and technical developments are focused around these key industry themes.
</a>

<a href=/automotive/aurora-online>High quality data and expert advice to make your simulations easier to set up and more accurate.
</a>

<a href=/automotive/blog>Read our latest blogs here for Tata Steel in Automotive
</a>
<a href=/engineering/key-products/ympress>Ympress®is a hot-rolled, high-strength, low-alloy steel with outstanding formability and consistent...</a>
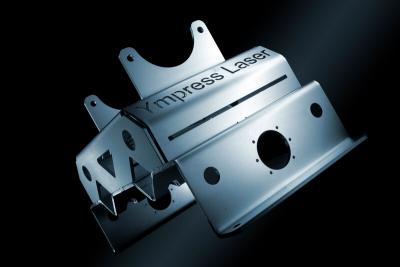
<a href=/engineering/key-products/ympress-laser>Tailor-made for efficient, high-speed laser cutting, this homogeneous, hot-rolled steel combines exc...</a>

<a href=/engineering/key-products/valast-abrasion-resistant-steel>Valast®is an efficient, reliable, wear-resistant steel plate that tackles heavy wear and tear while...</a>

<a href=/engineering/products/direct-rolled/high-strength-steel>Ymagine® direct-rolled steel comes in five high-strength, low-alloy (HSLA) grades offering either w...</a>
<a href=/engineering/products/cold-rolled/ymvit-steel-for-enamelling>Tata Steel’s Ymvit® cold-rolled steel for enamelling delivers end product and process benefits in...</a>
<a href=/engineering/products/cold-rolled/high-strength-steel>Tata Steel offers a range of cold-rolled steels for applications requiring high strength without the...</a>
<a href=/engineering/key-products/magizinc>
MagiZinc®is an innovative replacement for conventional galvanised steels. It provides superior co...</a>

<a href=/engineering/products/tubes/celsius-structural-hollow-sections>Celsius®is our range of fully normalized hot finished hollow sections to EN 10210.Designed to perfo...</a>

<a href=/engineering/products/tube/hybox-and-hybox-tt>We manufacture a broad range of tubes to serve the construction, conveyance, pressure, energy, autom...</a>
<a href=/engineering/key-products>Our key products add value to customers and end applications.
</a>
<a href=/engineering/products/hot-rolled/forming>Hot-rolled steel for cold forming is used for bending and deep drawing.
Tata Steel's forming grad...</a>
<a href=/engineering/products/hot-rolled/high-strength-steel>Tata Steel’s hot-rolled high-strength, low-alloy (HSLA) grades offer formability and strength for ...</a>

<a href=/engineering/products/hot-rolled/advanced-and-ultra-high-strength-steel>For further information about advanced and ultra high-strength steelsplease visit ourAutomotive cata</a>
<a href=/engineering/products/hot-rolled/structural-steel>The guaranteed strength and good weldability of our hot-rolled structural steel help ensure ease of ...</a>
<a href=/products/hot-rolled/durbar-floor-plate>Durbar®is the leading brand of hot-rolled structural steel floor plate, made in the UK for over 50 ...</a>
<a href=/engineering/products/hot-rolled/heat-treatable-steel>Tata Steel offers a choice of hot-rolled heat-treatable steels
Heat-treatable steels offer advant...</a>
<a href=/engineering/products/hot-rolled/valast-abrasion-resistant-steel>Efficient and reliable abrasion resistant steel sheet withstands harsh wear and tear whilst maintain...</a>
<a href=/engineering/products/hot-rolled/steel-for-pressure-vessels>Our structural steel for pressure vessels delivers excellent impact toughness and weldability.
Sp...</a>
<a href=/engineering/products/hot-rolled/steel-for-gas-cylinders>Tata Steel’s structural steel for gas cylinders offers excellent deep-drawing properties and welda...</a>
<a href=/engineering/products/hot-rolled/ship-plate>This hot-rolled structural steel offers excellent weldability for ease of processing.
We exercise...</a>
<a href=/engineering/products/hot-rolled>Hot-rolled steel offers performance, versatility and value.
</a>
<a href=/engineering/products/direct-rolled/forming>Ymagine® D1 is a direct-rolled, pickled and oiled, basic light-gauge drawing grade. Like all of ou...</a>
<a href=/engineering/products/direct-rolled/high-strength-steel>Ymagine® direct-rolled steel comes in five high-strength, low-alloy (HSLA) grades offering either w...</a>
<a href=/engineering/products/direct-rolled/structural-steel>Ymagine® S1 is a direct-rolled, pickled and oiled, structural steel.It provides a viable alternativ...</a>
<a href=/engineering/products/direct-rolled>Tata Steel's Ymagine®direct-rolled steel: a viable alternative to cold-rolled and hot-rolled steel....</a>
<a href=/engineering/products/cold-rolled/forming>Cold-rolled steel for cold forming and deep drawing is available in a range of grades.Each grade is ...</a>
<a href=/engineering/products/cold-rolled/ymvit-steel-for-enamelling>Tata Steel’s Ymvit® cold-rolled steel for enamelling delivers end product and process benefits in...</a>
<a href=/engineering/products/cold-rolled/high-strength-steel>Tata Steel offers a range of cold-rolled steels for applications requiring high strength without the...</a>
<a href=/engineering/products/cold-rolled/advanced-and-ultra-high-strength-steel>For further information about Advanced and Ultra-High Strength Steelsplease visit ourAutomotive cata</a>
<a href=/products/cold-rolled/structural-steel>Our cold-rolled structural steel is suitable for a wide range of applications.
It has a guarantee...</a>
<a href=/engineering/products/cold-rolled>Tata Steel offers a comprehensive range of cold-rolled steel comprising both continuously-annealed a...</a>
<a href=/engineering/products/metallic-coated>Tata Steel offers a wide choice of metallic coated steel.
</a>
<a href=/engineering/products/pre-finished-steel>Pre-finished steel products are made up of a series of layers, each with a particular function, syne...</a>
<a href=/engineering/products/electro-plated>At Tata Steel Plating we work closely with our customers to find cost-effective solutions to technic...</a>
<a href=/engineering/products/tubes>We have one of the broadest ranges of welded tube from any steel manufacturer. Our expertise in the ...</a>
<a href=/engineering/products>
WORKING together with the world’s leading equipment makers, steel processors and domestic applia...</a>
<a href=/engineering/applications/agriculture-and-forestry>Agriculture and forestry machinery users expect their equipment to be efficient, productive and robu</a>

<a href=/engineering/applications/construction-equipment>Working together, we can meet your growing needs across all types of construction and handling equip</a>

<a href=/engineering/applications/consumer-products>Domestic appliances, furniture,sanitaryand radiators.Quality steel making your consumer products mor...</a>
<a href=/engineering/applications/industrial>A huge variety of industrial applications, from drums and gas bottles to racking and shelving, and s</a>
<a href=/engineering/applications/steel-processors>Re-rollers, profilers, tube makers, coating lines.Supplying material you and your customers can rely</a>

<a href=/engineering/applications/transportation/tubes-in-trucks-and-trailers>Specialised tube solutionsin transportation (EN 10305/EN 10219) – help to optimise vehicle perform</a>

<a href=/engineering/applications/transportation>Our steels are used in trucks, trailers, trains and ships. Our expertise is in finding the right sol</a>
<a href=/engineering/applications>Construction equipment applications, consumer products and more.
</a>

<a href=/engineering/case-studies/bergerecotrail>Using Ympress® S700MC to manufacture BERGERecotrail® semi-trailer bodies and welded-frames for the...</a>
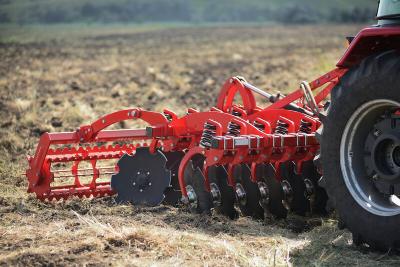
<a href=/engineering/case-studies/frank-original-boron-manganese>Expansion of boron manganese steel offering for agricultural machinery in partnership with Frank Wal...</a>
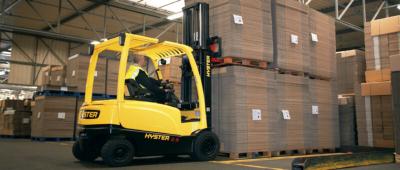
<a href=/engineering/case-studies/hyster-yale>Opportunities for Hyster Yale to deliver lower total cost of ownership to its customers.
</a>
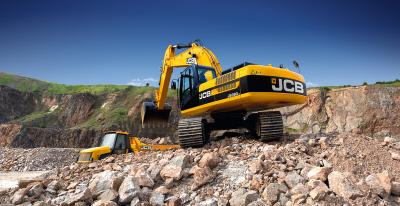
<a href=/engineering/case-studies/jcb-landpower>EnablingJCB to develop an optimally-designed next-generation tractor.
</a>

<a href=/engineering/case-studies/kuhn-gyrotedders>KUHN co-developed a newhollow section specification:Hybox TT.
</a>

<a href=/engineering/case-studies/linssen-yachts>S235 steel products create ultra-smooth hulls for Linssen Yachts.
</a>
<a href=/engineering/case-studies/palfinger>Crane maker Palfinger benefits from a unique partnership.
</a>
<a href=/engineering/case-studies>We can make a real difference to your performance by understanding your business and delivering stee...</a>

<a href=/services/nexus>Nexus is the new online customer portal designed specifically for Tata Steel's customers.
</a>
<a href=/engineering/services>Customer Technical Services offer technical consultancy and hands-on support tuned to your needs and...</a>
<a href=/Services>Overview of Tata Steel in Europe's services
</a>
<a href=/engineering/blog>Read our latest blogs here for Tata Steel in Engineering
</a>
<a href=/construction/products/roof/insulated-roof-panels>Our insulated roof panels and sandwich panels are available in a range of core thicknesses to meet o...</a>
<a href=/construction/products/roof/profiles>We offer a comprehensive range of profiles,built-upsystems and structural roof deck, to meet all you...</a>
<a href=/construction/products/roof>Building Systems UK (a Tata Steel enterprise) roofing systems, structures and accessories provide hu...</a>
<a href=/construction/products/wall/insulated-panels>Our insulated wall panels and sandwich panels are available in a range of core thicknesses to meet o...</a>
<a href=/construction/products/wall/facades/hub>Our facade systemsform the decorative element of a wall system andare available in bespoke sizes. Hi...</a>
<a href=/construction/products/wall/profiles>We offer a comprehensive range of profiles andbuilt-upsystemsto meet all your cladding requirements.</a>
<a href=/construction/products/wall/liner-tray>We meet designers' needs for efficiency, aesthetics and structural performance by offering a compreh...</a>

<a href=/construction/products/wall>As well as possessing excellent sustainability credentials, our wall systems are available with a va...</a>
<a href=/construction/products/flooring/composite-floor-deck>Building Systems UK's (a Tata Steel enterprise) metal floor decking range offers the ultimate steel ...</a>
<a href=/products/hot-rolled/durbar-floor-plate>Durbar®is the leading brand of hot-rolled structural steel floor plate, made in the UK for over 50 ...</a>
<a href=/construction/products/flooring>Our flooring range includes steel composite floor deck that offers the ultimate steel solution for m...</a>
<a href=/engineering/products/metallic-coated>Tata Steel offers a wide choice of metallic coated steel.
</a>
<a href=/construction/products/coil-flat-sheet/prefinished-steel-cladding>Colorcoat®exterior pre-finished steel has been developed specifically to support the aesthetic and ...</a>
<a href=/construction/products/coil-flat-sheet/prefinished-steel-cladding-row>Colorcoat®exterior pre-finished steel has been developed specifically to support the aesthetic and ...</a>
<a href=/construction/products/coil-flat-sheet/prefinished-steel-fit-out>Advantica®pre-finished steel. Setting the benchmark for quality and innovation.
</a>
<a href=/construction/services/service-centres/colorsteels-services>Colorsteels is Tata Steel’s leading UK service centre for pre-finished steel.
This position has...</a>
<a href=/construction/products/coil-flat-sheet>Available in a wide variety of finishes and materials our range of market leading products include C...</a>
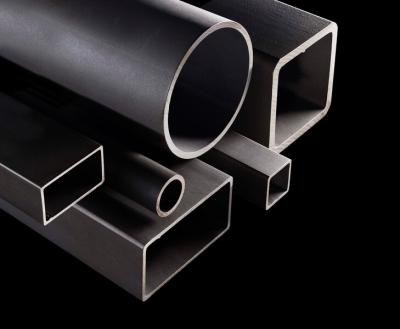
<a href=/construction/products/tube/structural-hollow-sections>Our range of both hot finished and cold formed structural hollow sections is one of the broadest ava...</a>
<a href=/construction/products/tube/conveyance>Pipework systems for building, engineering and industrial applications.
</a>
<a href=/construction/products/tube/energy>We are a global supplier of high frequency induction (HFI) welded plain end pipes for OCTG casing ap</a>
<a href=/construction/products/tube>Our range of both hot finished and cold formed structural hollow sections is one of the broadest ava</a>
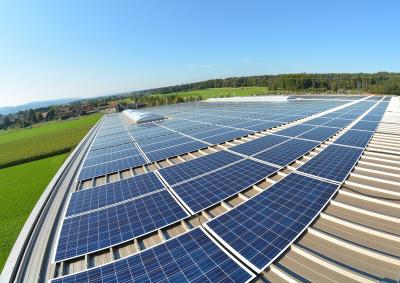
<a href=/construction/products/renewables/active-solar-air-heating/unglazed-transpired-solar-collector>An active solar air heating solution that provides a renewable pre-heat function.
AnUnglazed Tran...</a>
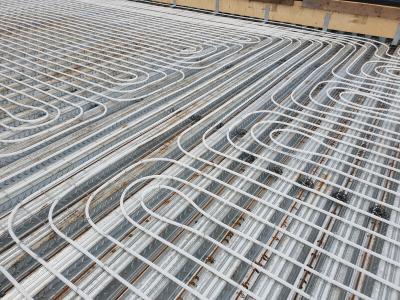
<a href=/construction/products/flooring/composite-floor-deck/comflor-active>ComFlor® Active facilitates truly sustainable control of room temperature in new buildings without ...</a>
<a href=/construction/products/renewables>We are a global supplier of pre-finished steel renewable products for the construction industry
</a>

<a href=/construction/products/cladding-accessories/facias-gutters>We supply a variety of fascias and gutters for a variety of roofs from the smallest domestic to the ...</a>
<a href=/construction/products/cladding-accessories/flashings-fabrications>Flashing and fabrications with a superior finish, made to your exact requirements
</a>

<a href=/construction/products/cladding-accessories>From bespoke and standard fabrications for our Colorcoat Urban® range to products for industrial gu...</a>
<a href=/construction/products/other/highway-engineering>Our long years of experience in the highway engineering market means we can offer a wide range of pr...</a>
<a href=/construction/products/other/trench-sheeting>Robust solution for both temporary and permanent use.
Tata Steel are a leading manufacturer of tr...</a>
<a href=/construction/modern-methods-of-construction-mmc>Tata Steel are designing and developing products and platforms to enable modern methods of construct</a>
<a href=/construction/products/flooring/composite-floor-deck>Building Systems UK's (a Tata Steel enterprise) metal floor decking range offers the ultimate steel ...</a>
<a href=/construction/products/wall/insulated-panels/formawall>Formawall® is a smooth faced, secret-fix, insulated wall panel, which is a one fix construction giv...</a>

<a href=/construction/products/wall/insulated-panels/trimapanel>Building Systems UK's (a Tata Steel enterprise) range of Trimapanel PIR insulated architectural wall...</a>
<a href=/construction/products/roof/insulated-panels/trisomet>Steel insulated roof panels with optimum performance for water drainage, strength and walkability.
...</a>
<a href=/construction/products/roof/profiles/trisobuild>Built-up roof cladding systems can be customised to meet your design requirements including thermal ...</a>
<a href=/construction/products/wall/profiles/trisobuild wall systems>Built-up wall steel insulated panel cladding systems open up design and performance possibilities fo...</a>
<a href=/construction/products/roof/profiles/roofdek>Building Systems UK(a Tata Steel enterprise) offers a comprehensive range of structural steel roof d...</a>
<a href=/construction/products/wall/internal/trimawall-internal-walling-system>Building Systems UK's Trimawall® has been designed to facilitate the move to high quality off-site ...</a>
<a href=/construction/services/guarantees/platinum-plus>Platinum®Plus is a system guarantee for 25 years, that covers durability, structural and thermal pe...</a>
<a href=/construction/key-products/building-systems-uk-building-envelope-solutions-and-structural-steel>The most comprehensive total steel building envelope solution manufactured from one UK source with f...</a>
<a href=/construction/products/wall/profiles/clickfals>A Simple and classic solution. ClickFals® is an exciting product from Tata Steel that is revolution...</a>

<a href=/construction/products/roof/profiles/trapes>These trapezoidal profiles are classical profiled steel panels for use on roofs or facades
In mod...</a>

<a href=/construction/products/wall/profiles/trapes>These trapezoidal profiles are classical profiled steel panels for use on roofs or facades
In mod...</a>
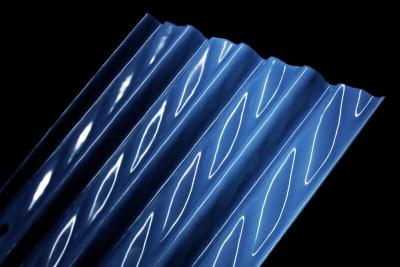
<a href=/construction/products/roof/profiles/sinus>Sinus- a combination of on trend and traditional profiles
Sinus profiles are suitable for use in ...</a>
<a href=/construction/products/wall/profiles/sinus>Sinus- a combination of on trend and traditional profiles
Sinus profiles are suitable for use in ...</a>
<a href=/construction/products/roof/profiles/harmonipluss>Effective, practical and highly economical
Aesthetic and highly economical HarmoniPlus® panels a...</a>
<a href=/construction/products/roof/profiles/hoyprofiler>Versatile and cost-effective
Tata Steel has a wide range of deep deck products with different tec...</a>
<a href=/construction/products/cladding-accessories/flashings-fabrications/flashings-norway>Freedom in design with enhanced architectural appearance
Standard flashings are available in vari...</a>
<a href=/construction/products/cladding-accessories/purlins-rails/z-and-c-purlins>Lightweight and strong
Z- and C-purlins combine lightness and strength with cost effectiveness in...</a>

<a href=/construction/products/cladding-accessories/condensation-regulating-fabric/constop-felt>Economical way to prevent condensation problems
This product is a very economical way to prevent ...</a>
<a href=/construction/key-products/building-systems-norway>A comprehensive range of building components and solutions to the building sector in Denmark, Norway</a>

<a href=/construction/products/tube/structural-hollow-sections/celsius>Celsius® is our range of fully normalized hot finished hollow sections to EN 10210.
Celsius® is...</a>
<a href=/construction/products/coil-flat-sheet/prefinished-steel-cladding/colorcoat-hps200_ultra>Super durableguaranteed performance.
Designed to withstand even the most demanding and aggressive...</a>
<a href=/construction/products/coil-flat-sheet/prefinished-steel-cladding/colorcoat-prisma>Aesthetics that last,guaranteed.
Colorcoat Prisma® demonstrates a step change by utilising cutti...</a>
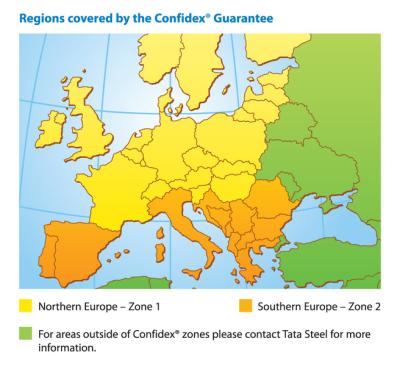
<a href=/construction/services/guarantees/confidex>Offers the most comprehensive guarantee for pre-finished steel products in Europe and provides peace...</a>
<a href=/construction/key-products/colorcoat>A range of pre-finished steel products which have been used for roof and wall cladding systems on co...</a>

<a href=/construction/products/roof/profiles/colorcoat-urban>Rigorously tested to guarantee performance in different conditions
Catnic® Urban Standing Seam s...</a>
<a href=/construction/products/facades/urban-seam>Limited combustibility wall system suitable for use on buildings over 18m tall.
Tata Steel has ta...</a>
<a href=/construction/products/wall/facades/colorcoat-urban-plank>Low maintenance system with excellent colour stability
Catnic® Urban(formally Colorcoat Urban®)...</a>
<a href=/construction/products/cladding-accessories/facias-gutters/colorcoat-urban-rainwater-systems>Superior finish that is quick and easy to install
Catnic® Urban(formally called Colorcoat Urban�...</a>
<a href=/construction/products/cladding-accessories/facias-gutters/colorcoat-urban-facias>An excellent solution for both new and replacement roofs
Catnic®Urban offers a range of fascia f...</a>
<a href=/construction/key-products/catnic-urban>Catnic®Urban is a quick fit roof and wall cladding system, specifically developed to offer fast, si...</a>
<a href=/construction/products/coil-flat-sheet/prefinished-steel-fit-out/advantica-controlled-environments>Tata Steelhas been producing Advantica® pre-finished steel for controlled environments for nearly 4...</a>
<a href=/construction/products/coil-flat-sheet/prefinished-steel-fit-out/advantica-doors-windows>The wide range of products for this sector can meet varying needs such as those of domestic doors, w...</a>
<a href=/construction/products/coil-flat-sheet/prefinished-steel-fit-out/advantica-lighting>Pre-finished steel for lighting applications
Advantica® is a range of pre-finished steel product...</a>

<a href=/construction/products/coil-flat-sheet/prefinished-steel-fit-out/advantica-ceilings>Tata Steel supplies a range of pre-finished steel products into the ceilings sector that can be used...</a>
<a href=/construction/products/coil-flat-sheet/prefinished-steel-fit-out/advantica-hevac>Pre-finished steel products are used extensively in the heating, ventilation and air conditioning in...</a>
<a href=/construction/products/coil-flat-sheet/prefinished-steel-fit-out/advantica-office-furniture>A range of pre-finished steel products that are specially formulated for interior applications. Thes...</a>

<a href=/construction/products/coil-flat-sheet/prefinished-steel-fit-out/advantica-teletronics>A range of material suitable for Teletronics applications, such as DVD players, set-top boxes, compu...</a>

<a href=/construction/key-products/advantica>Advantica®pre-finished steel products from Tata Steel can be used in a range of applications within...</a>
<a href=/construction/products/tube/conveyance/install>Robust and reliable building and engineering services solution.
Install®hot-finished tube has be...</a>
<a href=/construction/services/guarantees/confidexhome>Confidex® Home is the performance guarantee for Colorcoat HPS200 Ultra® and Colorcoat Prisma®, wh...</a>
<a href=/construction/services/guarantees/platinum-plus>Platinum®Plus is a system guarantee for 25 years, that covers durability, structural and thermal pe...</a>
<a href=/construction/services/guarantees>Tata Steel offer a wide range of system and product guarantees.
</a>
<a href=/construction/Building-systems-uk/sustainable-product-decarbonisation>Building Systems UK Carbon Lite product decarbonisation insetting scheme - Contributing to scope 3 e...</a>

<a href=/construction/sustainability/epd/bespoke-epd-request>Bespoke Environmental Product Declaration (EPD) Request
</a>

<a href=/construction/sustainability/providing-sustainability-information-through-EPDs>As an approved EPD programme operator, Tata Steel can produce product-specific environmental product...</a>

<a href=/sustainability/carbon-neutral-steel>The challenge of Carbon neutral production.
</a>

<a href=/construction/sustainability/sustainable-construction-for-long-term-outcomes-tubes>Material efficiency innovations and integrated local supply chains for tube steel provide long-term ...</a>
<a href=/construction/sustainability/design-for-circular-economy>The Bruntland Report, published in 1987, developed guiding principles for sustainable development as...</a>
<a href=/construction/sustainability/providing-sustainability-transparency-in-reporting>It isn’t enough simply to say that materials and products are sustainable - it has to be verifiabl...</a>
<a href=/construction/sustainability/responsible-steel-supplier>Tackling a climate and biodiversity emergency, and delivering social value, requires responsibility ...</a>

<a href=/construction/sustainability-three-pillars>Tata Steel is meeting the combined challenges of climate change, the circular economy, and responsib...</a>
<a href=/construction/services/cpd/arrange webinar>Tata Steel provide free CPD seminars either face to face or online. These can be booked at any time ...</a>
<a href=/construction/applications/industrial>Tata Steel Construction can provide architects, engineers and surveyors with the highest quality of ...</a>
<a href=/construction/applications/distribution>Tata Steel Construction can provide architects, engineers and surveyors with the highest quality of ...</a>
<a href=/construction/applications/commercial>Tata Steel Construction can provide architects, engineers and surveyors with the highest quality of ...</a>
<a href=/construction/applications/healthcare>Tata Steel Construction can provide architects, engineers and surveyors with the highest quality of ...</a>
<a href=/construction/applications/education>Tata Steel Construction can provide architects, engineers and surveyors with the highest quality of ...</a>
<a href=/construction/applications/Retail>Tata Steel Construction can provide architects, engineers and surveyors with the highest quality of ...</a>
<a href=/construction/applications/Residential>Tata Steel Construction can provide architects, engineers and surveyors with the highest quality of ...</a>
<a href=/construction/applications/stadia>Tata Steel Construction can provide architects, engineers and surveyors with the highest quality of ...</a>
<a href=/construction/applications/leisure>Tata Steel Construction can provide architects, engineers and surveyors with the highest quality of ...</a>
<a href=/construction/applications/agriculture2>Tata Steel Construction can provide architects, engineers and surveyors with the highest quality of ...</a>
<a href=/construction/applications/transport>Tata Steel Construction can provide architects, engineers and surveyors with the highest quality of ...</a>
<a href=/construction/applications/energy>Tata Steel Construction can provide architects, engineers and surveyors with the highest quality of ...</a>
<a href=/construction/applications>Tata Steel Construction can provide architects, engineers and surveyors with the highest quality of ...</a>

<a href=/construction/case-studies>From essential structural building blocks to striking aesthetic features architects, engineers, cost...</a>

<a href=/construction/case-studies>From essential structural building blocks to striking aesthetic features architects, engineers, cost...</a>
<a href=/construction/case-studies>From essential structural building blocks to striking aesthetic features architects, engineers, cost...</a>
<a href=/construction/case-studies>From essential structural building blocks to striking aesthetic features architects, engineers, cost...</a>

<a href=/construction/services/cpd>Our range of continuous professional development courses we have on offer in the UK, primarily aimed...</a>

<a href=/construction/services/cpd>Our range of continuous professional development courses we have on offer in the UK, primarily aimed...</a>

<a href=/construction/services/cpd>Our range of continuous professional development courses we have on offer in the UK, primarily aimed...</a>
<a href=/construction/services/digital-tools/comflor-software>ComFlor® 9.0.34 Softwareanalyses each of the ComFlor® composite floor decks in construction stage,...</a>
<a href=/construction/services/digital-tools/roofdek-software>The increasing complexity of roof decking projects makes any software aimed at easing the process ve...</a>
<a href=/construction/services/digital-tools/specification-creator>OurPlatinum® Plus system guaranteeoffers coverage for up to 30 years. Simply fill in your project d...</a>
<a href=/construction/services/digital-tools/CO2-calculator>Tata Steel has today unveiled a new building operational CO2 calculation tool that will help specifi...</a>

<a href=/construction/services/digital-tools/colorcoat-compass>Make an informed colour choice based on availability, feasibility and level of guarantee via our Col...</a>

<a href=/construction/services/digital-tools/tube>Developed to complement the original ‘Blue Book’ website, the new and innovative Celsius® Struc...</a>

<a href=/construction/services/digital-tools/norway-roof-planner/hub>In only a few clicks our Roofplanner will create a complete list of everything you need for your roo...</a>

<a href=/construction/services/digital-tools>At Tata Steel we embrace themove towards a connected, digital world and are continuously developing ...</a>
<a href=/construction/services/site-guidance/cladding>Information on the correct way to take delivery of your roof and wall cladding products, and how to ...</a>
<a href=/construction/services/colorcoat-site-guidance>Colorcoat site guidance
</a>

<a href=/construction/services/colour-matching-services>Through our Colour Consaltancy service we are able to offer colour matching and colour availability ...</a>
<a href=/construction/services/service-centres/colorsteels-services>Colorsteels is Tata Steel’s leading UK service centre for pre-finished steel.
This position has...</a>
<a href=/about-us/sites-and-facilities/service-centres/benelux-multisteel>MultiSteel offers one of the broadest multi-metal ranges in Europe, including HRP, CRC, HDG, DSP and...</a>
<a href=/construction/services/service-centres/colorsteels-services>Colorsteels is Tata Steel’s leading UK service centre for pre-finished steel.
This position has...</a>

<a href=/construction/blogs-news/blogs>Here you can find our latest blogs for Tata Steel in Construction
</a>

<a href=/construction/blogs-news/news>Here you can find our latest news for construction and infrastructure.
</a>

<a href=/construction/tata-steel/podcasts>Our range of podcasts cover some of the key areas in the world of steel in construction from intervi...</a>
<a href=/construction/blogs-news/blogs>Here you can find our latest blogs for Tata Steel in Construction
</a>
<a href=/packaging/products/tinplate>We supply a wide range of proven tinplate products for applications including DWI cans, easy-open en...</a>
<a href=/packaging/products/protact>Protactlaminated steel is food-safe and optimised for efficient, sustainable canmaking with opportun...</a>
<a href=/packaging/products/eccs>Well-proven in a range of applications, our tin-free packaging steel (ECCS) delivers reliable qualit...</a>

<a href=/packaging/products/tcct>Asustainable, reliable replacement for conventional tin-free packaging steel (ECCS) developed by Tat...</a>
<a href=/packaging/products/blackplate>Our track record in blackplate production spans several decades. Used as a proven substrate for our ...</a>
<a href=/packaging/products>As one of Europe’s leading suppliers of high quality packaging steels, we work closely with our bu...</a>

<a href=/packaging/products>As one of Europe’s leading suppliers of high quality packaging steels, we work closely with our bu...</a>

<a href=/packaging/products>As one of Europe’s leading suppliers of high quality packaging steels, we work closely with our bu...</a>

<a href=/packaging/products>As one of Europe’s leading suppliers of high quality packaging steels, we work closely with our bu...</a>

<a href=/packaging/products>As one of Europe’s leading suppliers of high quality packaging steels, we work closely with our bu...</a>
<a href=/packaging/products>As one of Europe’s leading suppliers of high quality packaging steels, we work closely with our bu...</a>

<a href=/packaging/applications>Our packaging steel products are designedfor a diverse range ofapplications from aerosols to food ca...</a>
<a href=/packaging/sustainability>Steel is the world’s most sustainable packaging material. It protects and preserves its contents a...</a>
<a href=/packaging/case-studies/bonduelle>Two thirds of Dutch consumers didn'tknow that a can is endlessly recyclable according to consumer re...</a>

<a href=/packaging/case-studies/snert>Joris Bijdendijk is a renowned Dutch chef at the Michelin-starred RIJKS restaurant, located next to ...</a>

<a href=/packaging/case-study/calvo-vuelca-facil>Consumers, from older users to children can sometimes find traditional tuna cans difficult to use du...</a>
<a href=/packaging/case-studies>We can make a real difference to your performance by understanding your business and delivering stee...</a>

<a href=/packaging/technology/innovation-centre>The Innovation Centre provides the technical knowledge and skills that helps us keep our products at...</a>

<a href=/packaging/technology/product-development>Our Product development team draws on a solid foundation in metallurgy, the latest developments in c...</a>

<a href=/packaging/technology>Our Product Development team draws on a solid foundation in metallurgy, the latest developments in c...</a>
<a href=/packaging/blogs-news/blogs>Read our latest blogs here for Tata Steel in Packaging
</a>
<a href=/sustainability/carbon-neutral-steel>The challenge of Carbon neutral production.
</a>

<a href=/sustainability/green-steel-solutions/optemis/optemis-carbon-lite>Optemis™Carbon Lite is a declaration-based, low carbon emission steel solution offering the potent...</a>
<a href=/sustainability/green-steel-solutions/optemis>Optemis representsTata Steel's green steeljourney in the UK.
</a>

<a href=/sustainability/green-steel-solutions/zeremis/zeremis-delivered>Reduce your upstream footprint through lower-emission transportation of steel orders
</a>

<a href=/sustainability/green-steel-solutions/zeremis/zeremis-carbon-lite>Zeremis®Carbon Lite is a declaration-based, low carbon emission steel solution that offering the po...</a>

<a href=/sustainability/green-steel-solutions/zeremis/recycled>Our new circular steel solution developed to help you meet your circularity targets now</a>

<a href=/sustainability/green-steel-solutions/zeremis>Together towards a zero-carbon emissions, circular world.
</a>

<a href=/sustainability/green-steel-solutions>We are introducing new green steel solutions today because the world can’t wait.
</a>

<a href=/sustainability/future-of-mobility>Mobility is a vital part of modern life, connecting usaround the world
</a>

<a href=/sustainability/green-steel-future-uk/media-and-resources>Press releases and downloads</a>
<a href=/sustainability/green-steel-future>Tata Steel UK's plan to decarbonise.</a>

<a href=/sustainability/circular-economy>The future is circular
</a>

<a href=/sustainability/city-of-tomorrow>
Steel is essential in shaping tomorrow’s sustainable communities.
</a>

<a href=/sustainability/environment>Respecting and safeguarding the environment is a fundamental principle held by all Tata Group compan</a>

<a href=/sustainability/fostering-societies>Connected to communities
</a>
<a href=/sustainability/responsible-steelmaker>Dedicated to investin a mix of breakthrough technologies for sustainable steelmaking
</a>
<a href=/sustainability/our-communities/community-partnership-programme>Tata Steelcontribution to communities'economic and social well-being through a proactive Community P...</a>
<a href=/sustainability/our-communities/sponsorship>Tata Steelcontribution to communities'economic and social well-being through a proactive Community P...</a>
<a href=/sustainability/our-communities>We aim to positively impact the communities in which we operate.
</a>
<a href=/sustainability/ethical-behaviour/code-of-conduct>Company code of conduct
</a>
<a href=/sustainability/ethical-behaviour/international-rbc-agreement-for-the-metals-sector>International RBC agreement for the metals sector
</a>
<a href=/sustainability/ethical-behaviour/supply-chain-transparency>Supply chain transparency
</a>
<a href=/sustainability/ethical-behaviour>Ethical behaviour is intrinsic to the way we conduct our business
</a>
<a href=/media/social-media>Social media channels from Tata Steel in Europe
</a>
<a href=/careers/uk/apprentices>An apprenticeship at Tata Steel is the first step of a rewarding career. We offer a diverse range of...</a>
<a href=/careers/uk/graduates>Our two-year graduate programme offers excellent opportunities for individuals who want to apply and...</a>
<a href=/careers/uk/placements>Placements are a hugely valuable experience for undergraduates, a chance to put theory into practice...</a>
<a href=/careers/uk/professionals>Engineering and technical innovation is at the very heart of our business.
</a>

<a href=/careers/uk/working-at-tata-steel/benefits>Tata Steel UK offers competitive compensation, learning and development opportunities, an inclusive ...</a>
<a href=/careers/uk/working-at-tata-steel/locations>Here, you can find out more about our locations across the UK. We have sites throughout the UK, and ...</a>
<a href=/careers/uk/working-at-tata-steel/employee-networks>Employee networks play a vital role in fosteringa positive work environment and maintaining strong e...</a>

<a href=/careers/uk/working-at-tata-steel>Here, you can find out more about our locations across the UK. We have sites throughout the UK, and ...</a>

<a href=/careers/uk/employability-hub>We have created this space, to support you. Irrespective of your career stage, whether you are just ...</a>

<a href=/careers/uk/get-in-touch-contact-us>You’ll discover an organisation with the ambition and resources, backed up by the commitment to tr...</a>

<a href=/careers/uk>You’ll discover an organisation with the ambition and resources, backed up by the commitment to tr...</a>
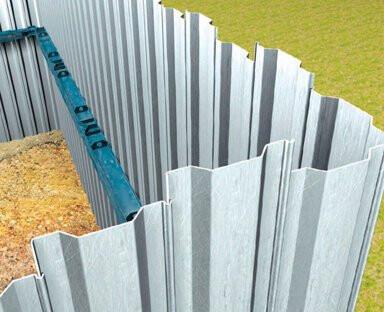
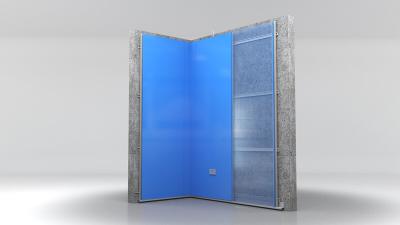
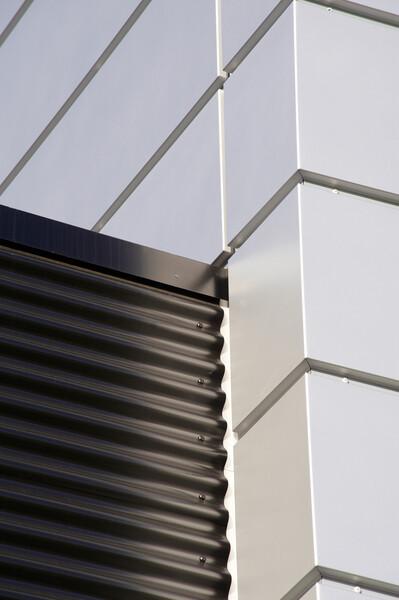
Although a Trisobuild® site-assembled system is lightweight and easy to install, careful consideration needs to be given to the design of the supporting wall system which needs to be constructed to accept horizontally fixed panels.

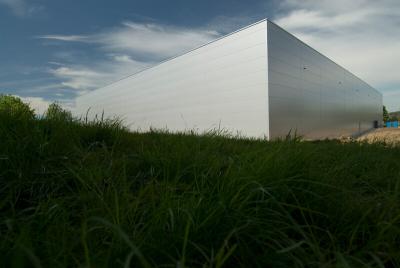
Cladding with the profile running horizontally is far more susceptible to apparent changes in colour, gloss and reflectivity. This effect is even greater on long buildings and is particularly noticeable to eye level. When installing long lengths of cladding with a horizontal profile it is wise to incorporate regular vertical features into the façade to break up the continuous profile into shorter sections
This blog provides guidance on how to install a horizontal Trisobuild® system to a regular horizontal cladding rail arrangement using a vertical liner and vertical Instaloc® HW spacer system.

The steps given below are instructions for a typical construction and should be used only as a guide. Specific technical details, method statements and site-specific risk assessments should be produced and applied for each building. An extended list of construction details is available from Tata Steel, and advice can be given via our Technical Department on any bespoke details that may be required.
Our updated Trisobuild® brochure provides more in-depth information and construction details for installing Trisobuild® systems horizontally.
Please contact our Technical Department for further advice or for an extended list of construction details on horizontal wall installation or use our online specification tool to help you create the right specification for the performance that suits the needs of your project. Doing this will give you peace of mind that cladding components are compatible and perform together as a system.